Showing posts with label handmade home. Show all posts

Monday, March 19, 2012

Handmade Home : Farm House Edition : Updates


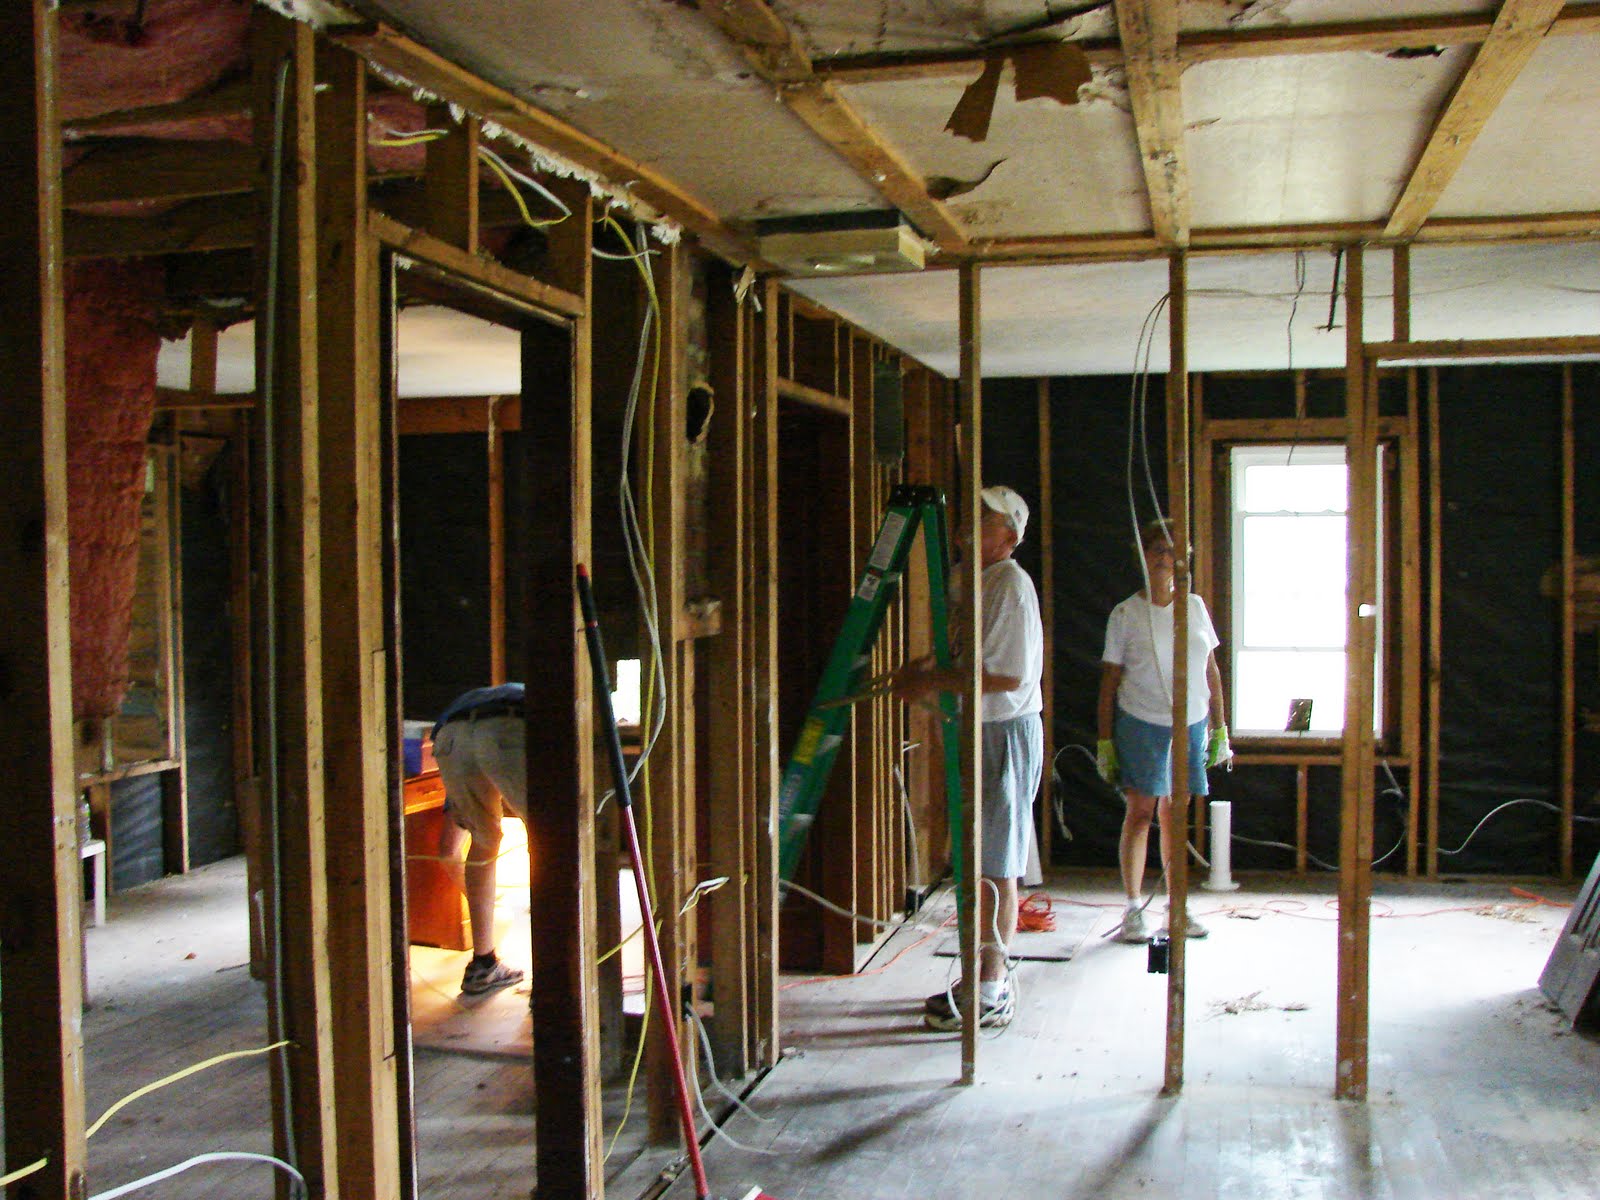
we've been busy, busy on the homestead lately with this gorgeous spring weather! so time for an update! i'll give you the BAD NEWS first - our drywall hanging/finishing has (yet again) been put on hold due to a structural issue that we are having to address - basically water was getting into the house through a crack in the cistern that made up a portion of the bathroom wall... the GOOD NEWS is that Matt got to use a jack-hammer to fix the problem! see below for pics...my Uncle Peter (who has been a huge help) is operating the concrete saw while Matt chisels away at the concrete with the jack-hammer... his brain was mush after a full day of trying to hold on to that vibrating jack-hammer!

we got new windows in the back laundry/mudroom and had all the older windows capped so the painted wood would not be exposed to the elements and peel any further... the shutters had to be removed to do this and we likely will not put them back on, but i think the capping really makes the house look like new!

as far as farming goes, i've already planted ten containers of starter seeds for tomatoes, broccoli and two kinds of basil...all of my seeds have sprouted now, except for one container of tomatoes... the first thing that sprouted up was the broccoli (pictured below)... once these little guys get a bit bigger and once we're in the clear regarding frost, i will put them in the ground!

our doxie pom, Taloulah, has been helping out with gardening as much as possible...basically, just being outside with me for moral support... :)

she is starting to adjust to being out on the farm with us well and can't wait until she can sniff around and find or dig up things like this (picture below) everyday! YUCK!

this is her FIND OF THE WEEK! she could hardly contain her excitement over finding this deer jaw... yippee! :-/

here's Matt talking with Uncle Pete about what he's been doing in the orchard... Pete has been out a lot planting MORE TREES! he said he's got an order in for a few more peach trees too...i've lost count of how many trees are up there now, but we are definitely very thankful for all of Pete's contributions to the farm!

To follow our transition into farm-life you can read here:
1, 2, 3, 4 , 5

Tuesday, February 7, 2012

Handmade Home : Farm House Edition : planting an orchard


we had a full weekend of working on the house - putting in more insulation, cleaning & organizing the construction mess so that workers can better access what they need and crawling around on our bellies & backs in the crawl-space under the house in order to staple weather-barrier plastic beneath the floors...

we also planted three more trees in our new orchard space (a peach, a fig and a granny smith apple)...Matt spent all day on MLK Day planting with my Uncle Peter who brought us the trees from his stash...he started a few of them on his own and grafted others so that they will produce a variety of kinds of fruit... he has been a great resource of knowledge about the plants and how to take care of them... we are hoping to have two or three trees produce for us this year!
enjoy the pics!


big smiles for planting orchards

Matt tucks that little fig tree into the ground

that tall tree on the left is a pear that was already there but we've added other pears, peaches, apples and figs to the mix too

those stakes sticking out of the ground will help stabilize the trees as they grow...the fencing around them with help protect them from deer and other animals who might be tempted to nibble at them

gorgeous day for gardening

the trees are planted on a diagonal grid about 25 ft.-30ft. apart to give them enough room to get BIG!

can't wait until these babies start producing fruit for us!

digging holes is hard work!

Friday, January 27, 2012

Handmade Home : Farm House Edition : moving right along

UPDATE on our Farmhouse remodel: our electrical work finally got approved! there was a little hiccup with the inspection, because when our electrician went to the clerk's office to fill out the necessary paperwork, he found that our little house was not registered in the realm of electric... but that issue got all straightened out so that we could get the house inspected...after we found out that we passed, we were able to move ahead with getting the walls up! two weekends ago we put in insulation...it's already feeling warmer in this little farm house!

then drywall went in this week! doesn't it look awesome?!?! maybe you don't think it looks so great but compared to where we were when we started out, having walls is a BIG deal :)
if you'd like to follow our remodel from the beginning you can read along here: 1, 2, 3, 4

Wednesday, January 18, 2012

Handmade Home : UPCYCLE DIY : ladder magazine rack...


in true Handmade Home fashion, i'm making a new use out of out of something old that had not been used for that purpose before... found this old wooden ladder in a trash pile...i cleaned it and sanded it down (so i wouldn't get any splinters from handling it)... then i stood it up against a wall and draped magazines over each rung of the ladder...

i love the look of the rough wood against the smooth surface of a slick mag!

the great height of the ladder standing vertically against the wall makes for a dramatic and interesting piece of "furniture", full of weathered-charm & character!

voila! a REUSED ladder turned into an UPCYCLED magazine rack!

Monday, January 9, 2012

Handmade Home : Farm House Edition : Shopping!

time for an update on our farmhouse... i'll post more photos of the actual place's progress later but for now, i wanted to share one of the great places we've been shopping for the new house... the fun part is finally going to begin! DECORATING! so we checked out a place called Bluegrass Green, where they sell environmentally friendly building supplies...

i picked out some paint swatches (will share later) from a brand called Yolo that boasts ZERO V.O.C... also checked out some of the tile they carry that are made of recycled materials

Matt investigated wood-burning stoves, dual-flush toilets, and he priced insulation made out of old recycled jeans and denim clothing (COOL!) called Bonded Logic ... we found the staff here to be very knowledgeable, friendly and helpful so we will be back soon to make purchases since our electric inspection is scheduled for this week!!!!...once that's done, walls go up and we'll hit up Bluegrass Green again!

Monday, October 17, 2011

Handmade Home : DIY : Before & After : Spooky Owl


for this edition of Handmade Home : Before & After i thought i'd put a spooky spin on things in honor of Halloween being this month... owls are a typical icon used in many a Halloween decoration, but the owl that i got from an estate sale this summer was creepy already with his one-eyed, cracked paint appearance...
to revamp him i simply 1) cleaned the owl with a damp washcloth, 2) sanded the areas that had peeled paint to make it smooth and 3) gave him several coats of high-gloss white spray paint... voila! a wise, old owl restored to his former glory (sans the creepy one-eyed look), with three easy steps...
i got this easy idea for restoration from my sister-in-law, Ashley who has a big white owl (twice the size of mine) in her livingroom... she said she got the idea from the fabulous Young House Love blog, who is always spray-painting things :)

Monday, September 26, 2011

Handmade Home : Farm House Edition : Ceilings OUT, Electric IN!

these photos were taken September 4th at our little house! we're moving right along...attic has been cleaned out of Matt's grandma's stuff... the electrician has roughed in wiring...ceilings are ripped out revealing this awesome lofted ceiling...we're going to try to keep the look of it while still insulating well... we shall see if that works out...i know it still doesn't look like much but i feel like we've come a really long way and things are finally starting to be "put in" instead of "taken out" and "ripped down"...next on our to do list is getting the heating & air guys in to put our central AC in!!!

found this treasure of a ceiling after ripping out the drywall ceiling in the laundry room & bathroom

we removed this pile of old books from the attic along with a bunch of Matt's grandma's old clothes... pretty neat seeing all the old stuff that was up there!

no more ceilings and wires (which means electricity!)

you can follow our gradual progress on the renovation here: 1, 2, 3

Thursday, September 15, 2011

Handmade Home : Farm House Edition : A BIG MESS means BIG SUCCESS


it's been awhile, so wanted to give you an update on our farm house renovation...WARNING: not so glam photos posted below!! but i'm comforted in the fact that sometimes it has to get really messy before it gets clean and awesome-looking... MESS = SUCCESS & PROGRESS!... the below photos were taken July 31st...

our friend, Emil, came and helped Matt rip out the laundry room & bathroom floor because the back part of the floor was not level but drooping downward like it was sinking at a pretty drastic angle... luckily the whole house was not sinking, just the floor...so cement was poured and supports were placed and the floor was built up to be level...we're going to get the plumbing/electric/AC & heat vents installed before putting a floor on this section of the house... Matt & Emil are also planning to reframe this area so that insulation can be put in between the original wall (which had no insulation) and the new framed wall!

this is a picture taken in the livingroom with my faux fireplace in place... it's not attached to the wall yet but i just wanted to bring it in & set it up to see how much room we'd have on each side and to get a visual aid for room inspiration... i LOVE this mantel!... we got a killer deal on it at the Burlington Antique Show on our visit this summer after some haggling with the vendor...

view standing in the livingroom looking into the kitchen

view from the kitchen looking into the livingroom and out the front door... no walls anywhere!...in other news: we discovered VIA our plumber while investigating the crawl space, that all our copper electric & plumbing has been stolen from under the house! :( real cool, robbers!... oh well, at least we know it will all be brand new now and done correctly and up to modern codes...

you can follow our gradual progress on the renovation here: 1, 2

Friday, September 9, 2011

Handmade Home : DIY : before & after chair revamp...

it's been awhile since i made a Handmade Home post but now i'm back with a BEFORE & AFTER! I found this old, beat-up dining chair at the Burlington Antique Show during my recent visit for FIVE DOLLARS! The chair was obviously the victim of a bad fabric choice as its upholstery. :( I removed the seat, primed and painted it a bright new color to match my existing chairs and reupholstered the seat in a fun, bright print fabric....this is how easy it all was:

1. remove the old fabric from the chair seat
2.cut a square piece of fabric, enough to cover and wrap around the bottom of the seat...you need about an inch of hang-over
3. pull the fabric taut and wrap around the bottom of the seat
4. use a staple gun to secure fabric to seat5. use a hammer to hit staples down that did not go all the way in the seat so that they're not sticking out
6. reattach seat to chair frame and VOILA! a five dollar fabulous chair!
if you ever want an easy refresh to seating, go with redoing dining chairs... upholstery is such a cinch on them and there's not much to paint either... a little work on these types of chairs can go a long way in making a big impact!