in true Handmade Home fashion, i'm making a new use out of out of something old that had not been used for that purpose before... found this old wooden ladder in a trash pile...i cleaned it and sanded it down (so i wouldn't get any splinters from handling it)... then i stood it up against a wall and draped magazines over each rung of the ladder...
i love the look of the rough wood against the smooth surface of a slick mag!
the great height of the ladder standing vertically against the wall makes for a dramatic and interesting piece of "furniture", full of weathered-charm & character!
voila! a REUSED ladder turned into an UPCYCLED magazine rack!
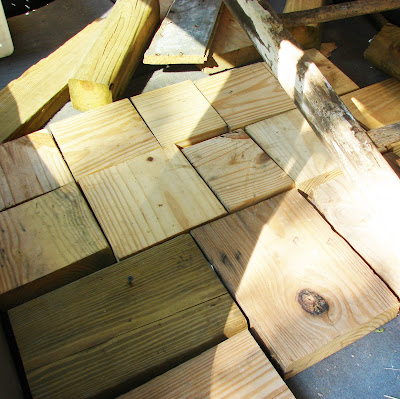
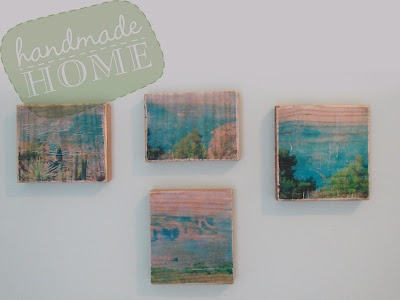
Since starting work on our little farm house, we've been trying to salvage all the scrap materials we can and re-purpose them if we can't directly use them in construction on the house...so what do you do with a pile of scrap wood??? make really cool photo blocks to hang on the wall!!! here's step-by-step how we turned the above photo into the below photo:
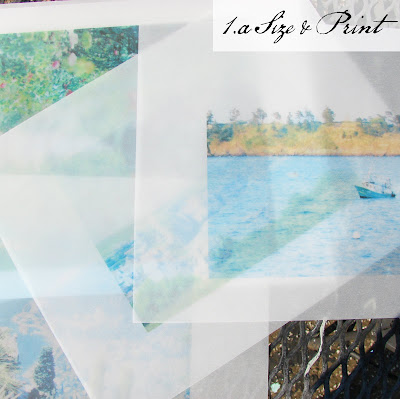
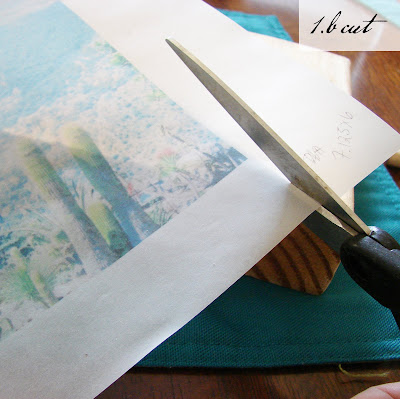
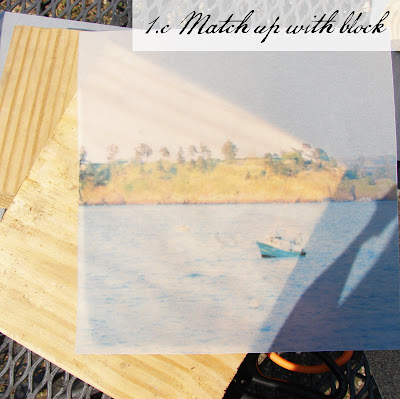
1) Select some photos and size them in photoshop to fit your wood blocks. I think landscapes always turn out well with this treatment so I selected some photos from my trip to France. Print the images out on Vellum paper. (You can print in black and white or color but just remember, when you start to glue the photos to the blocks some smearing may occur so make sure you're alright with the colors that might be produced if the image smears a bit.) Cut out the image and match it up to the properly sized block.
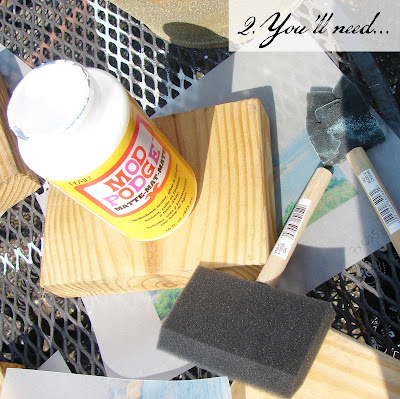
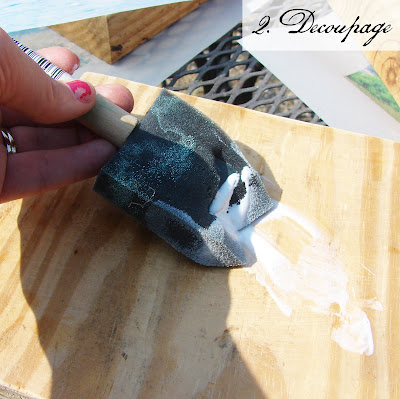
2) Using decoupage, paint a thin layer of the glue directly onto the front of the wood block. Place the printed vellum paper on the front and smooth it down gradually to avoid bubbles on the surface. After the paper has attached and dried to the block, paint another layer of decoupage glue on top of the vellum paper. If you start your top coat of decoupage before the initial layer has dried, you are more likely to develop bubbles in the surface of your image, so be patient!
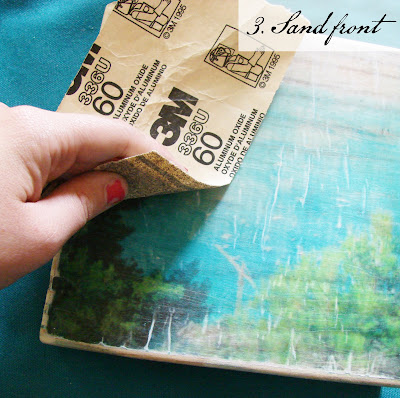
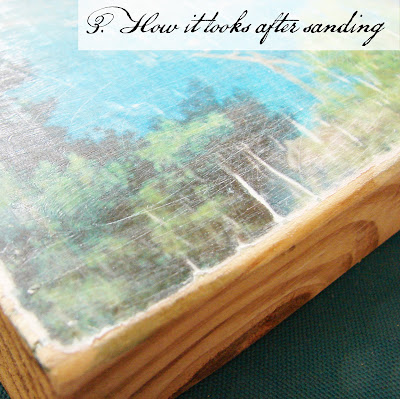
3) Wait until the second coat of decoupage is completely dry and then sand over top of the photo to give a distressed look. I used a sandpaper grade with a pretty abrasive grit since I wanted my photos to have a really worn look but you can sand as much or as little as you like.
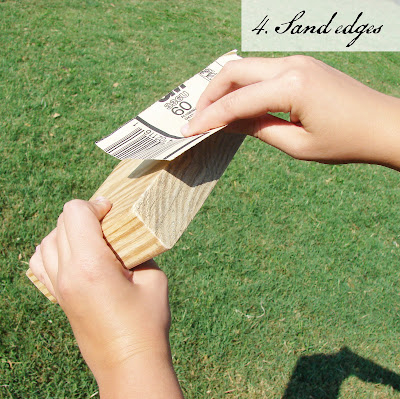
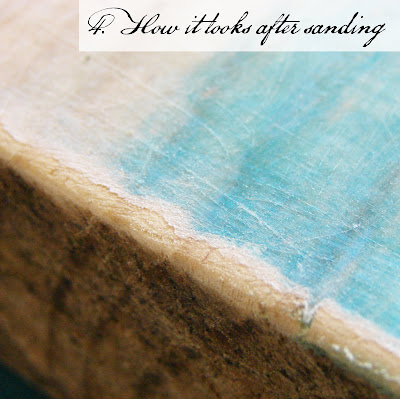
4) After you have sanded the front of the photo, sand the edges of the block to round the corners and get rid of the roughness of the wood. Brush off dust from the sanding process.
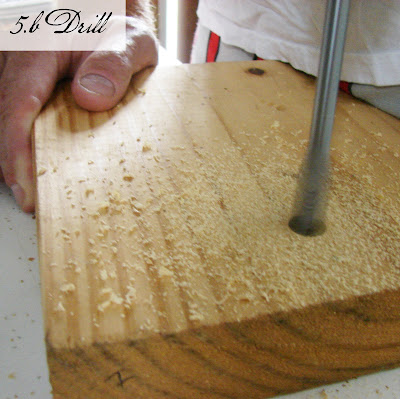
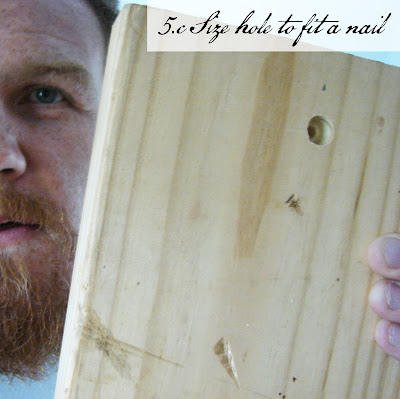
5) In order to hang your art on the wall you must drill a hole for it to sit on a nail. So, on the back of the block measure about 1-1/2" down from the top and mark a dot with a pencil at the center width-wise. Drill a hole in the back of the block, just wide enough and deep enough for a nail or screw to fit in the hole.
6) After the above steps are finished you might want to add a coat of clear polyurethane over the photo to seal and protect the image. If you are more of a light-sandpaperer, the top coat of decoupage might suffice. But, if like me, you like a more distressed-look to the finished piece and therefore your sandpapering process was pretty aggressive, you might want to add the coat of polyurethane. Here are the finished products hung up on display in our office at home.
P.S. These are a great idea for Christmas gifts!!!
for this edition of Handmade Home : Before & After i thought i'd put a spooky spin on things in honor of Halloween being this month... owls are a typical icon used in many a Halloween decoration, but the owl that i got from an estate sale this summer was creepy already with his one-eyed, cracked paint appearance... to revamp him i simply 1) cleaned the owl with a damp washcloth, 2) sanded the areas that had peeled paint to make it smooth and 3) gave him several coats of high-gloss white spray paint... voila! a wise, old owl restored to his former glory (sans the creepy one-eyed look), with three easy steps... i got this easy idea for restoration from my sister-in-law, Ashley who has a big white owl (twice the size of mine) in her livingroom... she said she got the idea from the fabulous Young House Love blog, who is always spray-painting things :)
it's been awhile since i made a Handmade Home post but now i'm back with a BEFORE & AFTER! I found this old, beat-up dining chair at the Burlington Antique Show during my recent visit for FIVE DOLLARS! The chair was obviously the victim of a bad fabric choice as its upholstery. :( I removed the seat, primed and painted it a bright new color to match my existing chairs and reupholstered the seat in a fun, bright print fabric....this is how easy it all was:
1. remove the old fabric from the chair seat 2.cut a square piece of fabric, enough to cover and wrap around the bottom of the seat...you need about an inch of hang-over 3. pull the fabric taut and wrap around the bottom of the seat
4. use a staple gun to secure fabric to seat5. use a hammer to hit staples down that did not go all the way in the seat so that they're not sticking out 6. reattach seat to chair frame and VOILA! a five dollar fabulous chair!
if you ever want an easy refresh to seating, go with redoing dining chairs... upholstery is such a cinch on them and there's not much to paint either... a little work on these types of chairs can go a long way in making a big impact!
i came up with this little project after being inspired by this film and ... it's a fun, colorful & cheap solution to wall decor...plus it has a handmade, crafty-feel to it which always makes a home cozy to me...this is Posies & Plume's second DYI feature on Handmade Home...if you missed the first, check it out here... read on for how to make this Ribbon Wall-Hanging...
For this project you will need: 1) spools of ribbon with various textures, widths & colors 2) a dowel rod painted the color of your choice 3) scissors 4) sewing pins 5) glue or needle & thread (or sewing machine) cut the ribbons at varying lengths
lay the ribbon out (beneath the dowel rod) in the desired order of colors/lengths... make sure to leave an inch of ribbon above the dowel rod
fold the inch of ribbon sticking out the top side of the dowel rod over
secure with a sewing pin...at this point you can choose either to glue, hand-sew or machine sew each ribbon directly below the dowel rod to create a loop so that the ribbon can hang from the dowel rod...i hand-sewed them... if you choose to glue, i would leave the pin in place until the glue has dried and voila! wasn't that easy for a cute wall-hanging? it would be great decor at a party or hang over the door of a kid's room so they can brush through the ribbons every time they enter their room... it will give the room a magical feel!
as promised and as seen in our booth at the Buy Local Fair in May... i was inspired to make these by the store displayat West Elm during my trip to Nashville ... i love the recycled-look and handmade-shabbiness of them... they spruce things up in a fun and easy way while putting something that might be discarded to use YOU WILL NEED: scissors, floral wire, twine or clear fishing line & 7 sheets of newspaper
1. Cut the seven sheets of newspaper to a size that reflects the desired size of your poof balls.
2. Stack the newspaper sheets and accordion fold them into 1 inch folds until the entire length of the paper is folded into a fan.
3. Cinch the center of the folded newspaper. Fasten the piece of floral wire around the middle and twist until loosely secure.
4. Round both ends of the newspaper with scissors and discard clippings.
5. String a piece of the clear fishing line (or twine if you want a more rustic look) through the floral wire and then knot it. You will use this string to hang the poof so make sure it is long enough.
6. Fan the newspaper out and carefully (as not to rip the paper) begin pulling individual sheets out to make a full poof.
7. Hang the finished poof at desired height and enjoy! I hung my newspaper poofs in my craft booth but you could use them in a window or hang them from a chandelier over your dining table. Keep them up all the time or use for simple and fun party decor.